Wednesday, August 10, 2016

Why You're Not Losing Weight When You Run

Yum french toast!
One of the MOST annoying comments I get about my health and fitness is:

"Well, you can eat whatever you want because you run."

People who say that... have never run.  Simple as that.

The only way to really explain this is to take food and nutrition out of the equation.  Please realize, though, that what you put in your mouth is 80% of your success when it comes to your health.  So really, it doesn't matter if you're running, lifting, doing HIITs, or flying through the air like Peter Pan, you're not going to lose fat, build muscle, or reach any of your goals if you're not eating for your goals.

Ok, now that we have that cleared up...

The trouble with weight loss

The idea of weight loss is relatively simple.  Burn more calories than you eat.  Boom, lose weight.  However, if it were that simple, everyone would find success with it.  There are many many factors that affect what and how your body reacts not only to the exercise you do but to the food you put in your body.  "Weight" can come from fat, from muscle, from bloat, from water, from inflammation.  Genetics and diseases and medical issues can often determine how your body reacts with and to the food you put into it.  There is also human error.  There is no possible way to TRULY know how many calories you are burning, whether it's during your actual workout, after the workout, or during your daily life.

What running does for your body

If your an average runner, running because it's good for you or running because you're training occasionally for a moderate-length race, you're probably doing most of your running as steady-state cardio.  You run for a certain length of time at a comfortable pace, maybe 60-70% of your maximum capacity.  Basically, you're just trying to run a certain distance or for a certain length of time without dying in the middle.  This is what I do.  Exercising this way is EXCELLENT for you, don't get me wrong!  It strengthens your heart and cardiovascular endurance, decreases your resting heart rate and blood pressure, increases your lung and heart volume, improves your circulation, among other things.  And if your goal is to say you finished a race and didn't die, then your first order of business is going to be to build upon your steady-state runs.  However what steady-state cardio doesn't do is build strength, muscle, power or burn any substantial amount of fat.

What HIIT does for your body

HIIT stands for High Intensity Interval Training.  Basically, you do some kind of cardiovascular activity at 90-100% of your maximum capacity for a short time, usually about two minutes or less, and then some kind of rest or low-intensity activity for another short period of time, usually less than three minutes.  These two alternate back and forth for a total of no more than about 20 minutes.  What you do during your high and low intensity intervals is up to you, as long as your really pushing to your max cardio ability during the high intensity parts.  You should not be able to hold a conversation during your HIIT.  In fact, you should push so hard that you couldn't go a second longer than the amount of time you've allotted for that exercise!  When you work out like this, something called the "afterburn effect" or EPOC (Excess Post-Exercise Oxygen Consumption) happens.  Your body continues to burn calories, and fat, LONG after you've finished working out.  Your resting metabolism increases, and your body becomes more efficient at using fat as fuel.  Depending on what exercises you choose for your HIITs, you may also build power.  Yay!

What running and HIIT don't do for your body

Neither steady-state cardio like running nor HIIT will really help you build strength and muscle.  The fastest, most effective way to build strength and muscle is by weightlifting, and that is an entirely different blog post.  Just know that building muscle is another great way to burn fat (and frankly, my favorite way #dontputmedownforcardio).

Final thoughts

Whatever way you choose to workout is up to you!  The point is that you're working out!  I personally hate cardio, especially cardio where I'm pushing myself to my max, so you'll almost never find me doing HIITs.  When I'm running, my goal is to train for a distance race, so I stick to steady-state cardio training.  I choose to use weightlifting as my tool to burn fat.  HIITs are a fantastic way to burn fat in a short amount of time, so if you don't have a lot of time, HIITs may be the answer for you!

Distance, baby


Sources:
https://www.cellucor.com/blog/cardio-throwdown-steady-state-vs-hiit
https://experiencelife.com/article/steady-state-cardio-vs-high-intensity-interval-training/


Thursday, July 21, 2016

How to Train for a Half Marathon

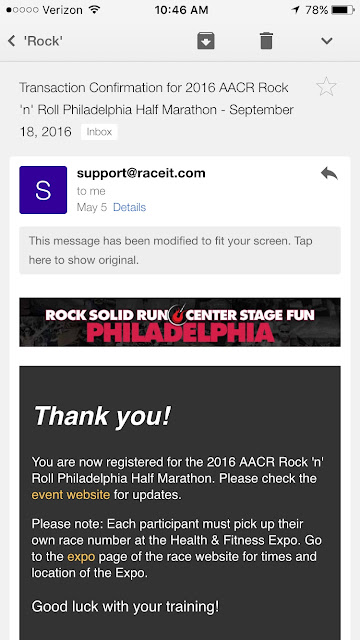
It's almost time to start training for my third half marathon!  I'll be honest:  I didn't really want to run this race.  Last November when I created my 30 Before 30 list, one of my goals was to run multiple Rock'n'Roll races in 2106, which would get me a special medal.  I ran the Arizona RnR Marathon in January, so I planned to run the Philly RnR Half in September.  By the time May sign ups rolled around, I just didn't feel like it.

But here I am anyway, signed up and ready to run what will most likely be the hottest race I've ever run on September 18.

When I first started running races, I used Hal Higdon's training schedules from his website.  If you run races and you've never heard of Hal, you need to catch up (har har, get it?).  He is one of the premier names in distance running, having run over 100 marathons and contributed articles to Runner's World magazine since their second issue in 1966!  He has training schedules for running your FIRST 5k all the way to placing at Boston.  I also just discovered he has a training schedule for the Dopey Challenge in Disney World, which I will definitely be checking out.

Anyway, I absolutely still use Hal's schedules, but because I work so much cross-training into my plan, I modify them a bit.  If you're interested in doing the same, here is what I do!


1.  Know your body

I know myself and my body enough to know things like how many days a week I can handle running, how many weeks I need to train, what kinds of running workouts I need to do based on my goals, etc.  I have found that for myself, it's more important for me to focus on distance and endurance, not speed.  When I combine both shorter and longer comfortably paced runs with cross-training such as weightlifting, I have consistently seen my race speed increase and my finish times decrease.  Sure I could add in some speed work and probably decrease my finish time even more,  but I have found that I do not enjoy speed work, so why do it if I personally am still getting results?

These are things you might not know if you've never run a race, or never run the particular distance that you are aiming for.  That's ok!  I'm still going to show you how you can alter a running schedule to include a bit more cross-training, if that's your goal.


2.  Choose a training schedule


Here is the training schedule for Intermediate I for a Half Marathon, which is where I'm going to start.  The Intermediate I schedule focuses on distance and endurance, where the Intermediate II schedule focuses on speed.  You want to note the basics from this schedule:  how many weeks it is, how the long runs progress (starting with 4 m and ending with 12 m right before the half, tapering back every few weeks) and how the weekday runs progress (gradually getting longer before tapering the last two weeks before the run).  These are some of the things I'm going to think about when I build my own plan.


3.  Figure out how much time you need to train

The first thing I'm going to do is cut down this schedule from 12 weeks to 8.  When I trained for my marathon, I ran a half after 8 weeks and I improved my time by 8 minutes, so I know it's possible for me.  If this is the first time you are racing this particular distance and if it is the longest distance you've ever raced, I would suggest keeping the number of weeks suggested by the Hal Higdon training plan.  His plans are usually anywhere from 12-20 weeks.  I also decide that I am going to start my long runs at 6 miles.  When I'm running for "fun" (i.e. running but not training for anything), I'll occasionally do 5 miles relatively easily.  Six mile runs are where I would start to categorize a "long" run for myself, so that's where I'll start training.  I'll keep the mid week runs a little lower in milage, anywhere from 3-5 miles.


4.  Figure out when you want to run

The next thing I'm going to do is cut the days of running per week from 5 to 3.  Five days of running, for me, is too much, and only gives me one day of cross-training.  I'm also going to make sure that I'm not running two days in a row.  Again, that's what works for me.  Making these changes also allows me to be more flexible with my schedule.  I can move my running days around based on whether I'll be at the beach on the weekend, or if the weather is particularly horrible.  I would say three days a week MINIMUM if you're training for a race.  I've done two days a week before, but that was when I was trying to keep an injury at bay.  I was able to keep my fitness level, but I did not improve at all during that time.


5.  Start to create your new schedule

After I consider all these things, my new schedule looks like this:


My long runs are on Saturdays and every third week I reduce my miles to give my body a little break.  You can do your long run ANY day of the week, but try to keep it relatively consistent.  You should have 5-7 days in between your long runs to recover.  My weekday miles slowly increase, and the week of the half I cut back again.  This new schedule now gives me one rest day and three days to cross-train.  


6.  Plan in your cross-training

Because I'm in the middle of the program Chalean Extreme, I will be doing the weightlifting days on Monday, Wednesday and Friday.  You can really do any cross-training on these days.  However, I would suggest NOT doing a cardio- or lower body-heavy cross-training on Fridays, or whatever day comes right before your long run.  You want to make sure you are fresh for those runs.  So as a general rule, I would probably do a lower body-based cross training on Monday, a cardio cross training on Wednesday, and an upper body-based cross-training on Friday.  You could also do two upper body days and one lower body day.  Whatever you do, MAKE SURE YOU DO A LOWER-BODY WORKOUT.  I can't stress this enough.  Whether it's weight-based or cardio/plyo based, you need to do a leg workout while you're training.  Running works the same muscles and pounds on the same joints run after run after run while neglecting other key secondary areas.  Cross-training your lower body allows you to strengthen those muscles that serve to support you on your runs and keep you from overuse injuries.  They keep your body balanced.


7.  Get out there and run!

Now it's time to train!  If you have any questions at all, or are interested in developing or adjusting an already existing running plan, let me know!  I love helping people schedule workouts to fit their needs.  There are so many options.  Everyone can run a race, so if that's something you're interested in, don't feel overwhelmed by the training schedule!  Don't feel like you have to give up your other favorite workouts! Let me help you out!

Monday, July 11, 2016

Summer So Far

Well hello there!  I feel like I need to re-introduce myself.  AWKWARD.  Sorry about leaving you high and dry for a few months there.  Don't worry, you didn't miss much.  Just a lot of selfies.  AND I knocked a few things off my 30 Before 30:

6.  Go parasailing:


16.  Not work during the Summer of 2016:

Hello, neighborhood pool 8-)


22.  Replace our screen door:
The men, hard at work.


I'm also knee-deep in working on making the following happen:

4.  Go on a city Segway tour:

Just six days away!


9.  Finish decorating the "crap room":

The room is completely empty, the ceiling is out, and paint will be picked out this week!


14.  Run multiple "Rock 'n' Roll Races":

I ran the full in Arizona in January and I'm signed up for the half in Philly in September.


25.  Go to a Rangers game at Madison Square Garden:

To which I conned my Dad into taking me...


While I know I won't be able to accomplish all my goals, I'm excited to move them all over to the list of things I get to do after I turn 30.  There are also a couple goals that I decided are not as important to me as they were when I put them on this list last November.  That doesn't mean I don't want them, I just don't know that I'm going to push myself to make them happen in the next 3.5 months.

Wednesday, June 15, 2016

Cafe Latte Shakeology Recipes!

A little over a year ago, I posted over 100 recipes for Shakeology.  It's one of my favorite posts-- I refer back to it all the time when I'm looking to try something new or looking to give suggestions to people trying Shakeology.  This past January, the newest Shakeology flavor, Cafe Latte, came out and it is AH-MAZING.  I've been drinking it all this time, yet I haven't added to my list of recipes!

So here you go, over 30 recipes JUST for Cafe Latte Shakeology!

Interested in trying it out?  The link is at the bottom!


Cafe Latte Shakeology

Cafe Latte is the newest Shakeology flavor.  Even just mixed with water, it has the light, creamy flavor of coffee ice cream, not the bitterness of black coffee.  Here are some great ways to make it (use one scoop or packet of Cafe Latte Shakeology):
  1. Cafe Latte: 1 cup water, 1/2 cup of ice optional
  2. Hazelnut Latte: 1 cup unsweetened almond milk, 2 tablespoons of chopped raw hazelnuts, 1 teaspoon pure hazelnut extract, 1/2 cup ice
  3. Muddy Nutty Buddy: 1/2 cup unsweetened almond milk, 1/2 cup water, 2 teaspoons of all-natural peanut butter, 1/4 large banana
  4. Mocha Caramel Latte: 1 cup of unsweetened chocolate almond milk, 1 teaspoon pure caramel extract
  5. Creamy Coconut Late: 1/2 cup of water, 1/2 cup canned lite coconut milk
  6. Anise Latte: 1 cup unsweetened almond milk, 1 tsp. pure anise extract
  7. Frozen Thai Ice Coffee: 1 cup strongly brewed cold coffee, 1/2 teaspoon of ground cardamom, 1/2 tsp. pure almond extract
  8. Honey Peanutty Coffee: 1 cup unsweetened almond milk, 2 teaspoons all-natural peanut butter, 1 teaspoon raw honey
  9. Black Forest Coffee: 1 cup unsweetened chocolate almond milk, 1/4 cup organic tart cherry juice
  10. Peanut Butter Mocha: 1 cup unsweetened almond milk, 2 teaspoons unsweetened cocoa powder, 1 teaspoon pure maple syrup (or raw honey), 2 teaspoon all-natural peanut butter
  11. Vanilla Sea Salt Latte: 1 cup unsweetened almond milk, 1 dash sea salt (or Himalayan salt), 1/2 fresh vanilla bean, cut in half lengthwise.
  12. Greek Coffee: 1 cup strongly brewed cold coffee, 1/4 cup low-fat plain Greek yogurt, 1 teaspoon raw honey
  13. Mocha Java: 1 cup unsweetened chocolate almond milk
  14. Coco-Latte: 1/2 cup unsweetened almond milk, 1/2 cup coconut water beverage, 2 teaspoons unsweetened shredded coconut
  15. Red Eye Coffee: 3/4 cup water, 1/4 cup brewed espresso
  16. Cinnamon Dolce Latte: 1 cup unsweetened almond milk, 1 teaspoon ground cinnamon
  17. Pumpkin Spice Latte: 1 cup water, 1/2 canned pumpkin puree, 1/2 teaspoon ground pumpkin pie spice
  18. Flaxseed Banana Joe: 1 cup unsweetened almond milk, 1/4 large banana, 1 tablespoon flaxseed
  19. Orange Mocha Latte: 1 cup unsweetened almond milk, 2 tablespoon unsweetened cocoa powder, 2 teaspoons finely grated orange peel (orange zest)
  20. Salty Caramel Latte: 1/2 cup water, 1/2 cup low-fat milk, 1 dash sea salt, 1 teaspoon pure caramel extract
  21. Iced Vanilla Latte: 1 cup water, 1 teaspoon pure vanilla extract
  22. Blueberry Brew: 1 cup unsweetened almond milk, 1/3 cup fresh or frozen blueberries
  23. Spicy Latte: 1 cup water, 1/2 teaspoon ground cayenne pepper, 1/2 teaspoon ground cinnamon, 1/4 teaspoon ground nutmeg, 2 teaspoons raw honey
  24. Maple Coffee: 1 cup unsweetened almond milk, 2 teaspoons pure maple syrup
  25. Peppermint Mocha: 1 cup unsweetened chocolate almond milk, 1 teaspoon pure peppermint extract
  26. Honey Nut Latte:  1 cup unsweetened soy milk, 2 teaspoons all-natural cashew butter, 1 teaspoon raw honey
  27. Almond Latte:  1 cup unsweetened almond milk, 1 teaspoon pure almond extract, 2 tablespoons slice raw almonds
  28. Banana Spice Latte:  1/2 cup water, 1/2 cup unsweetened almond milk, 1/2 large banana, 1 teaspoon ground cinnamon
  29. Tiramisu Latte:  1/2 cup unsweetened chocolate almond milk, 1/2 cup water, 2 tablespoons part-skim ricotta
  30. Oatmeal Latte:  1 cup unsweetened almond milk, 2 tablespoons dry old-fashioned rolled oats, 1 teaspoon raw honey
  31. Mexican Spiced Coffee:  1 cup water, 1/2 teaspoon ground cinnamon, 1/4 teaspoon ground cloves, 1 teaspoon finely grated orange peel (orange zest), 1 teaspoon raw honey

Wednesday, April 13, 2016

Baked Buffalo Chicken Wings


The magic that is buffalo chicken.  I literally can't get enough.  Problem is, most places that make out-of-this-world buffalo wings deep fry them to within an inch of their life.

What you'll learn after trying this recipe:  Totally unnecessary.  These chicken wings are quick, easy, health, and BAKED.  The hardest part has been finding these cute little "wingettes" in the grocery store.  They never have them with any consistency!  Makes it hard to plan, but when they do have them, IT'S WING NIGHT!

Baked Buffalo Chicken Wings
Prep time:  10 minutes
Cook time:  30 minutes
Total time:  40 minutes
Yield:  4 servings per pound of chicken

Ingredients:
Chicken wings, "wingettes" or "drumettes" (my container was 1.75 lbs)
1/2 cup flour
1 tsp salt
2 tsp chili powder
1 tsp garlic powder
1/2 tsp pepper
2 Tbsp baking powder
Buffalo sauce (I used about a half cup)
Butter (I used about 1 tbsp)

Instructions:
Preheat the oven to 450 degrees.  Combined all dry ingredients into a bowl and thoroughly coat the wings.  Arrange the wings on a well-greased (I use coconut oil spray) cookie sheet.  Cook wings for 15 minutes, flip, and cook for another 15 minutes.  Just before the wings are finished cooking, melt the butter into the wing sauce and stir to combine.  I used 1 Tbsp of butter in a 1/2 cup of sauce and it was still pretty spicy.  Add more butter to lessen the spice of the sauce.  When the wings are finished cooking, coat them in the sauce and serve!


If you're looking for a delicious, HEALTHIER alternative to blue cheese dressing, look no further than my homemade version!


Friday, April 1, 2016

Radishes and Excuses

Blogosphere... I have failed you.

I only posted twice in March and twice in February.  Not only poor blogging practice, but one of my 30 Before 30 was to blog three times a month.  Oops.  I could give you a butt-load of excuses, but that's not my style.  So instead, I start this month anew.  And no, this isn't an April Fools joke.

I'll tell you what is a joke though.  Radishes.

True to form, I waited until the last day of March to try my new food.  Ironically, very similar in appearance to beets (my new food from February), but decidedly MUCH cuter.


I can't say the same for the taste.  I'm not going to sugarcoat it... although I did sprinkle some salt on them before I took a bite.  The first bite was uneventful.  The second bite was gross.


And there you have it!  No fancy recipe, just good old fashion taste-testing.


Tuesday, March 1, 2016

The Beets

Regardless of how awesome the band was on Doug (Killer Tofu, anyone? #90sKid), there was nothing you could've done to make me want to try beets.  While the color is beautiful, it's not a typical color of natural food, and the consistency REALLY weirded me out.  I knew one day I would try them, but every time I considered it, I wasn't ready.


Along came February, and with that, the need to try a new food.  Nothing was really inspiring me.  I seriously considered okra, but after some research, it seemed like a better food to try in North Carolina when I visit my parents during Easter.  We were back to square one, with literally five days left in the month.

Then Rachel, Mistress of Weird Foods, mentioned that she had made herself some deeeelicious beet hummus.  Hummus?  I thought.  I like hummus!  And this got me thinking... I MIGHT be ready to try beets, if I could transform them into one of my favorite Greek condiments (are there any others)?

So on February 29, as if I could've waited any longer, my friend Ashley (Mistress of Vegetarian Food) came over and we made Rachel's Beet Hummus recipe.

Ladies and gentlemen... it was indeed DEEEELICIOUS.

Enjoy!

Beet Hummus
Prep time:  5 minutes
Cook time:  1 hour 20 minutes
Total time:  1 hour 25 minutes
Yield:  14 1/4 cup servings


Ingredients:
2-3 large beets, roasted, peeled, and chopped
1 (15 oz) can of garbanzo beans (chickpeas), rinsed and drained
1/4 cup tahini (ground sesame seed)
5 T of lemon juice
2 cloves of garlic
2 t ground cumin
1 t salt
2 T extra virgin olive oil


Instructions:
To roast the beets, cut off the leaves and roots and wrap them loosely in tin foil.  Cook at 350 degrees for about 1 hour and 20 minutes.  When they are finished, let them cool a bit before taking off the foil.  To peel them, simply rub the beets with a wash cloth under cool water.  Works like a champ!  Chop the beets (if preferred.)  Place all ingredients EXCEPT olive oil into a food processor and puree.  Finally, gradually puree the olive oil into the mixture!

You can see Ashley isn't used to taking selfies while eating.
Very pleased with the final product!
Calories (per serving):  94
Total Fat:  5.1 g
Saturated Fat:  .7 g
Cholesterol:  0 mg
Sodium:  248 mg
Carbs:  10 g
Fiber:  2.8 g
Sugars:  2.4 g
Protein: 3.2 g


That Time I Ran Every Day

I'm not quite sure what I was thinking.  Having just come off the marathon, I swore I would take a nice long break from running.  I was pretty pumped about it too.  And then I read this article about taking a local Philly challenge to run at least one mile EVERY day in February.  And I thought, "One mile?  I can do that!"

Ughhhhh.  What was I even thinking?  I thought, if anything, ten-ish minutes of fresh air and exercise every day would do wonders for my mood and my attitude.  It really didn't.  In fact, it made me irritated and angry that after my actual weightlifting workout in the morning, I still had to figure out when I could go out and run.  Twice I ran in the rain DURING school.  Once I ran during a tornado warning.  Once I ran in between glasses of wine.  Quite a few times I ran in sub 32 degree temperatures, while the wind threatened to blow me over into the oncoming traffic in my neighborhood.

But I also ran in 50 and 60 degree temperatures.  I ran in the sunshine and in the sunset.  One day, I even ran 3.5 miles, my longest run since the marathon.  One day it flurried, and that was kind of fun.

Every day we had to post a picture on Instagram with the hashtag #RunStreakPHL.  Here I present to you, my collection of photos.  Enjoy reliving all the emotions (and weather) with me.


Friday, February 26, 2016

One Pan Mexican Quinoa

Literally the easiest thing I've ever made.  Super filling, super delicious, super vegan (if you're into that) AND awesome for Friday nights during Lent (shout out to my Catholics).  Really, no negatives in this amazing dinner.  And it goes great with margaritas and/or wine.  So there you go.


One Pan Mexican Quinoa

Prep time:  10 minutes
Cook time:  25 minutes
Total time:  35 minutes
Yield:  4 servings (Dan and I pretty much ate it all)


Ingredients:
1 T olive oil
2 cloves of garlic, minced
1 jalapeno, minced
1 cup dry quinoa
1 cup vegetable broth (to be honest, I had chicken broth, so that's what I used)
1 (15-oz) can of black beans, drained and rinsed
1 (14.5-oz) can fired roasted diced tomatoes
1 cup corn kernels
1 t chili powder
1/2 t cumin
Salt and pepper to taste
1 avocado, peeled and diced (optional)
Juice of one lime
2 T chopped, fresh cilantro leaves (also, technically, optional)

Instructions:
There are literally three steps.  First, heat the olive oil in a large skillet over medium-high heat.  Add garlic and jalapeños and stir until fragrant.  Add the quinoa, broth, beans, tomatoes, corn and spices.  Bring to a boil and then cover and simmer until the quinoa is cooked through (25-35 minutes).  Top with avocado, lime and cilantro.  Oh and chese.  We added cheese.

Done.  I mean literally, how easy and delicious does this sound.  Also makes fantastic leftovers.

(original recipe from http://damndelicious.net/2014/04/09/one-pan-mexican-quinoa/)

Monday, February 8, 2016

No Equipment? No Problem!

One of the many hats I wear is as the Business Manager for the local high school theater.  I love it.  It's easy, the high school is right next door to the middle school I work at, and not only is it my alma mater, but basically the entire directorial staff is comprised of alumni as well.  We have a lot of fun together and the kids put on AMAZING performances.  ALMOST as good as the performances I was in when I was there ;)

This spring, the kids are putting on the stage version of High School Musical.  There are a group of kids who are supposed to be "Jocks" in the show... they're even going to stage a real basketball game! Trouble is... most of them are not actual "jocks" in real life.  Plus, the dancing in this show as a whole is unreal, and the kids need to be able to keep up.

Of course, the director had the brilliant idea to call upon my expertise.  So I whipped up a little something.  And when I say a little something, I mean probably the most difficult workout I have ever come up with.

I love it so much.  It's perfect for them.  As you'll here me say in the little instructional video below, I wanted to create something that would focus on their speed, agility, and strength... all things they would need for their dancing and basketball scenes.  I wanted them to be able to do it without any equipment, in a space the size of their bedrooms, and even if they only had ten minutes.  These kids are BUSY.  I also wanted it to be hard enough so that they had ample opportunity to get better and to see their progress.

I tried one round with them a couple weeks ago.  Needless to say, they wanted to kill me.


So, here it is for you to try it yourself:

Jock's Workout

Warm up (15 seconds each):
Jumping Jacks
Twists
Arm Windmills
Toe Kicks

Exercises:
Do each for one minute.  Repeat up to two more times.
1.  Jump Squat Lunges
2.  Pushups
3.  Soccer Juggle
4.  High-low Planks
5.  Skater Jumps (single/double/triple)
6.  Burpee Tuck Jump
7.  Grapevines
8.  Mountain Climbers
9.  Glute Bridges
10. Ab Twists


I'm so proud of how many times since then they've come to tell me they've been doing the workout.  I can only hope that they'll take what I've taught them and use it to understand the importance of workout out in general.  Let me know how you like it!

Sunday, January 31, 2016

10 Things That Happened During Dry January

So... I did it.  With just ONE drink after my marathon, I made it a total of 28 days in the month of January without drinking (I know the math's not quite right... I did drink on January 1 and 2).

It was an interesting experience, to say the least.  I'm pretty confident the last time I went anywhere close to 28 days with out alcohol, I was 20 years old.  I would assume this is pretty normal, for a 29-year-old who has never been pregnant.  Hell, I probably haven't gone a week without alcohol since I was 20 years old.  So what happen during those 28 days?


10 Things That Happened During Dry January


1.  I didn't lose any weight

You would think that cutting out all those empty calories for such a significant amount of time as four weeks would see the numbers on the scale plummeting, but it's just another example of how the scale is just ONE measure of health.  Sure, my weight fluctuated the four pounds it usually does, but basically, I hovered around my typical 130 lbs.  However, my pants DID fit better, an indication that some other health benefits were at work.  I did not attempt Dry January for the sole purpose to lose weight, so I didn't take pictures or measurements at the start, but my pants are really the only measurement I need right now.


2.  I didn't drink any more water than usual.

I don't like water.  So instead of drinking it to replace my alcoholic beverages, I just ended up pouring myself a glass of water and it sat in front of me while I ate.  Oh well.


3.  I had less decisions to make.

I try to be as intentional as possible when choosing my wine pairings for dinner.  Sometimes it takes a good five minutes for me to pick a wine.  If I ask my husband, make that 10 minutes (he's not the quickest decision maker).  None of that is necessary when you're not drinking wine.


4.  I realized how I connect some events with alcohol

We had a giant blizzard last weekend.  Whenever there's a blizzard, I always put Bailey's in my coffee in the morning.  The moment I realized I couldn't do that, I was incredibly sad.  Why?  It's not like I was going to drink enough to Bailey's to get wasted or even buzzed.  Clearly I don't rely on the taste of the Bailey's, because I probably only ever add Bailey's to my coffee five times a year.  Never the less, I was surprised how disappointed I was.


5.  We went out to eat less.

Our favorite restaurants are centered around wine and beer (Zinburger, anyone?).  Since I couldn't drink... we didn't go out at all.


6.  I had to find other things to do with my friends.

Ok, mostly just Rachel.  A couple times I thought to myself, "If Rachel and I can't hang out and drink, what would we do?"  That's sad.


7.  I became irritated with people who couldn't abstain.

I never want to think that I NEED alcohol.  Obviously, because that's kiiiinda like an alcoholic.  So, when people I was doing this with were really struggling or gave into temptation, it really annoyed me.  But of course, that's not fair.  Everybody's got their own shit and need to do what they need to do.  "You do you" as they say.


8.  I felt like I needed to stress to people that I wasn't doing this because I was pregnant.

I'm not pregnant.

9.  I read more right before bed.

Maybe because I wasn't always in that sleepy stupor that wine puts you in?  Anyway I've loved it.  I missed Harry Potter.

10.  I criticized my body less when I looked in the mirror.

This was the most surprising thing that happened to me over the last month.  I think it's totally normal (albeit not ideal or even healthy), for women to criticize their bodies from time to time.  Even though I didn't lose ANY weight (and frankly, didn't even work out that much, aside from running the marathon), I can't remember I single time this month when I stood in front of the bathroom mirror and tried to pinch the fat on my hips and stomach.  Yes, I do that.  Not every day, but apparently, often enough to where I noticed I WASN'T doing it this month.  Why do you think that was?  Because I really had less fat as a result of less drinking?  Because alcohol is a depressant?  Who knows.  What I DO know, is that even if I had lost 100 pounds, having a positive reaction when looking at yourself in the mirror is probably the BEST thing that could've come out of these last 28 days.

Tuesday, January 26, 2016

Butternut Squash Mac and Cheese

With January comes New Years Resolutions for a lot of people.  As you probably know though, my "resolutions" started on the day I turned 29 with my list of 30 Before 30.  This meant that January required that I try a new food!

Usually, I aim to try the new food in it's most unadulterated form.  That way, I really know how I feel about it before I start mixing it into things.  This time, though, I was inspired to try butternut squash during my search to find a healthier version of mac and cheese.

My friends on Facebook suggested the following recipe that is originally from the Team Beachbody Blog.

I got all ready to start, and realized I had no idea how to even CUT a butternut squash.  No worries, that's what google is for.


Butternut Squash Mac and Cheese

Prep Time:  15 minutes
Cook Time:  61 minutes
Total Time:  1 hour and 16 minutes
Yield:  10 servings, about 1.5 cups each

Ingredients:
1 lb. dry whole wheat macaroni (or any kind of pasta shape)
1 tsp. olive oil
1 medium onion, chopped
2 medium red bell peppers, chopped
3 cups cubed butternut squash
1¾ cups low-sodium organic chicken broth
1 cup low-fat (1%) milk
2 Tbsp. low-fat (1%) plain Greek yogurt
1 cup shredded Gruyere (or Swiss) cheese
1 cup shredded sharp cheddar cheese
Sea salt and ground black pepper (to taste; optional)
Nonstick cooking spray

Instructions:
Preheat oven to 375° F.  Cook pasta according to package directions, then drain and set aside.  While the pasta is cooking, I cut up the squash and chopped up the onions and peppers.  Next, heat the olive oil in large nonstick skillet over medium-high heat, then add the onion and bell peppers.  It should take about 4 to 6 minutes, stirring frequently, for the onion to cook to translucence. Set aside.  Combine the squash, broth, and milk in a medium saucepan. Bring to a boil over medium-high heat. Reduce heat to medium; gently boil for 22 to 25 minutes, or until squash is tender.  The milk might curdle a little, but that's not a big deal.  Be careful not to let it overflow!
Once the squash is done cooking, place squash mixture in a blender or food processor; cover with lid and kitchen towel. Blend until smooth.  I actually blended it in three separate batches, just to make sure it didn't overflow from my food processor.
Combine all the ingredients (squash mixture, macaroni, onion mixture, yogurt, and cheeses) in a bowl. Season with salt and pepper if desired; mix well.  Pour pasta mixture in a 13 x 9-inch ceramic or glass baking dish that has been coated with spray. Bake for 25 to 30 minutes, or until sauce is bubbling.


We decided to eat this macaroni concoction with our favorite Buffalo Chicken Burgers (baked, since we were decidedly snowed in from two feet of snow).  I didn't realize how... orange our meal was going to look.


I was definitely apprehensive, as I usually am when trying a new food...


Final thoughts:  I didn't love it, and I didn't hate it.  I felt the same as when I tried spaghetti squash... it didn't taste like the original.  Even though it was orange and had some cheese in it, it really didn't taste a whole lot like mac and cheese.  And frankly, it took forever to make.  Cutting that squash was no picnic either.  Dan loved it, so that's good, but I don't see myself making it again soon.

Friday, January 22, 2016

75 Ways to Spend a Sober Snow Day

Guess who decided not to drink during the month with the first major snowstorm of the year?!

THIS GIRL.

Can't lie, it's been tough seeing everyone's alco-haul (see what I did there?) that they've been preparing for this weekend's east coast slam of Winter Snow Jonas.


Also, did you know they named winter storms?  Now you do.

So anyway, here I am, determined to stick to Dry January... while it's decidedly NOT dry outside.  What's a girl to do?

1.  Sleep in.
2.  Read a book.
3.  Make a snowman.
4.  Deep clean your kitchen.
5.  Deep clean your bathroom.
6.  DEEP CLEAN EVERYTHING.
7.  Do a workout you wouldn't normally have time to do.
8.  Make it a double day and do a second workout you really never have time to do.
9.  Take a nap.
10.  Light a fire (obviously only if you have a fireplace).
11.  Take a bath.  Light candles.  Play music.  Pretend you're at the beach.
12.  Play a board game.
13.  If you're alone, play solitaire with actual playing cards.
14.  Make a Dream Board either online (try www.picmonkey.com) or IRL with some old magazines
15.  Watch a movie
16.  Watch a movie series
17. Watch a whole series of a new show.
18.  Watch a whole series of an old favorite show.
19.  Call your mom.
20.  Call your grandma.
21.  Meal plan.
22.  Meal prep (if you have everything you need)
23.  Make an EPIC meal (breakfast?  lunch?  dinner?!)
24.  Youtube something you've always wanted to learn to do.  Start learning.
25.  Craft something.
26.  Make a gratitude list.
27.  Make a list of everything you want to do this spring.
28.  Make a list of everything you want to do this summer.
29.  Video chat with a friend or more!  Try http://zoom.us.  It's free!
30.  Build a blanket and pillow fort.  Even if you're sans kids.
31.  Online shop.
32.  Balance your checkbook (you know you haven't done THAT in forever)
33.  Do yoga.
34.  Listen to a podcast.  If you're looking for some personal development and entrepreneur topics, here are my favorites!
35.  Try meditating.  Youtube has guided meditations!
36.  Do a crossword puzzle.
37.  Put together a puzzle.
38.  Have a dance party.  Make sure you sing at the top of your lungs.
39.  Shovel the snow for a neighbor who could use the help.
40.  Have a snowball fight.
41.  Try some new fun makeup.
42.  Don't wear any makeup at all!
43.  Research some non-alcoholic drinks.  Make those!
44.  Write a poem.
45.  Do your nails.
46.  Set up a domino topple.
47.  Play video games.
48.  Play the Wikipedia game.
49.  Sign up for something you've always wanted to try.
50.  Organize your iTunes.
51.  Organize your iPhoto.
52.  Make a slideshow or playlist for a friend.
53.  Download an album you've been wanting.
54.  Download an album of someone you've never heard of.
55.  Research your heritage.
56.  Do laundry.
57.  Stalk some people on FB ;)
58.  Reconnect with one of those people.
59.  Drink tea.
60.  Learn astrology.
61.  Go through your closet and remove everything you haven't worn in two years.  Put it in a pile to donate.
62.  Clean out your inbox.  Or one of them.  I have like six.
63.  Run in the snow.
64.  Youtube puppies.
65.  Design your own t-shirt.
66.  Watch a TEDTalk.
67.  Write a letter to someone.
68.  Get lost in lists at BuzzFeed.
69.  Play quizzes at Sporcle.  They have every topic you could ever imagine.
70.  Have sex ;)
71.  Make a new pinterest board.
72.  Master the selfie.
73.  Learn to french braid... your own hair.
74.  Cuddle with something... a kid, a significant other, a pillow, a stuffed animal.
75.  Go to bed early!

What are your suggestions?